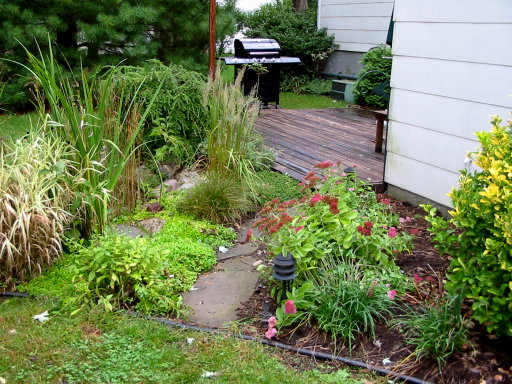
The general plan here is to replace this stone path coming from the deck with an arched wooden bridge over a stream bed. As you can see in this photo, there is no bridge and no stream bed here.
I've been thinking about adding an arched footbridge off the deck for several years now...
My in-laws were planning a visit in late Fall, and since we remodeled our kitchen last year, I thought this year maybe we could try to build a garden pond bridge.
Oh, but just what type of bridge was I thinking of? Good question. I wasnt sure either. So I started looking at pictures and plans that were available on the Internet and came upon this one. It wasnt exactly what I wanted, but it was pretty close...
So let's get to work!
The general plan here is to replace this stone path coming from the deck
with an arched wooden bridge over a stream bed. As you can see in this
photo, there is no bridge and no stream bed here.
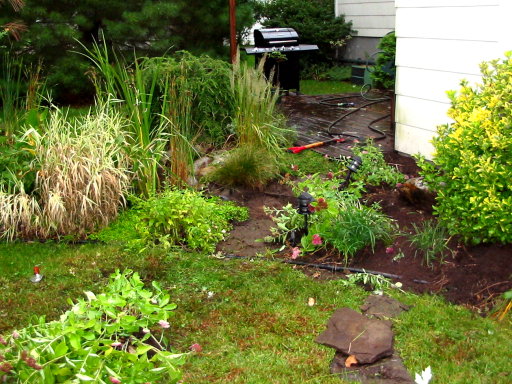
So one rainy day, the kids and I set out to work on the stream bed.
First, we removed some of the stepping stones, along with one plant
that would be in the way of the stream bed (we relocated that plant).
It's also hard to see in this picture, but I pulled a big rock out of
the pond and put it where the stream bends to come out toward the lawn.
Next, I grabbed some old pond liner and we dug it into the dirt and placed stones of assorted sizes on top of that...
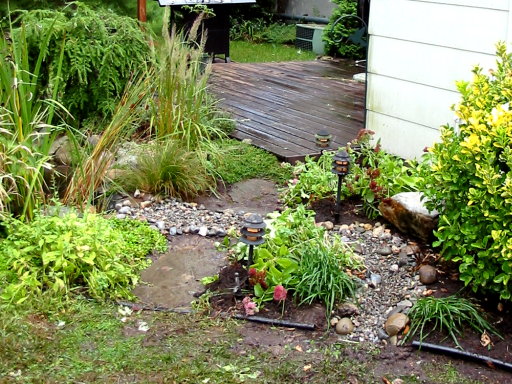
And there you have it: A stream bed!
It really is a fully-functional stream; if the water level on the pond gets too high, it will crest behind the pump and then flow over a hump in the liner, downhill through the stones and come out on the lawn. The important thing here, of course, was to ensure that water from the lawn never flows back into the pond.
So with the stream bed complete, we waited for my in-laws to arrive.
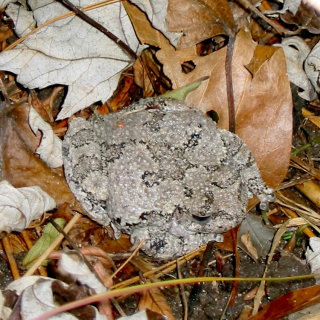
While we waited, we noticed a new
Gray Treefrog
next to the pond! Could this
be one of those tadpoles we brought back from Buffalo, NY earlier
this Spring?
And now we start building the bridge!
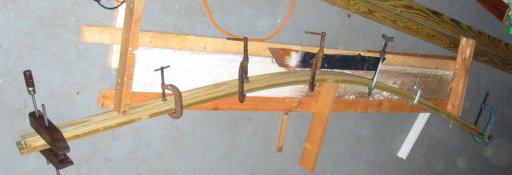
Step one: Create an arch. My Father-in-law used some scrap pieces of wood to build a mold in the shape of the arch. He then glued two pieces of pressure-treated wood together so it would retain the shape. He made two of these, which formed the base of the bridge. Incidentally, I'd like to thank my neighbors for lending us the extra clamps we needed for this project!
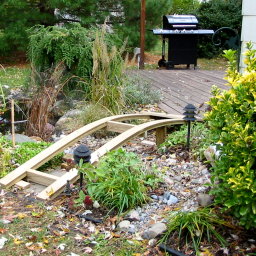
Step two: Place the arches so that they angle into the hewn out deck,
then screw the decking boards into place. You'll notice this bridge
is not exactly the same as the one in the
plans... ours is
more narrow and made entirely of wood. Check the attention to detail
in how the bridge is cut right into the existing deck!
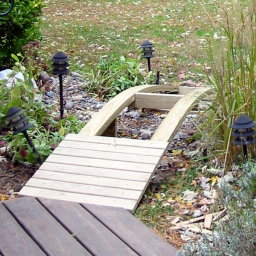
Step three: Craft a hand railing. Since our bridge was narrower
than the one in the plans, we decided a single railing would look
best here (and not detract from the pond to the right).
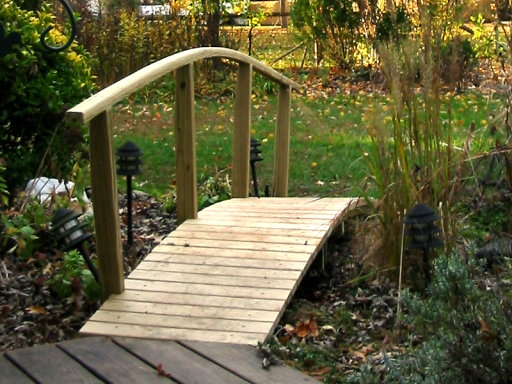
This looked great, but... do you see those three path lights to
the left of the bridge? They really do not belong there, so I
asked my Father-in-law if he could add a second railing where I
could put some down-lighting!

And so he put in that second rail to which I attached low-voltage
lighting.
And there you have it, the pond bridge I imagined years ago!
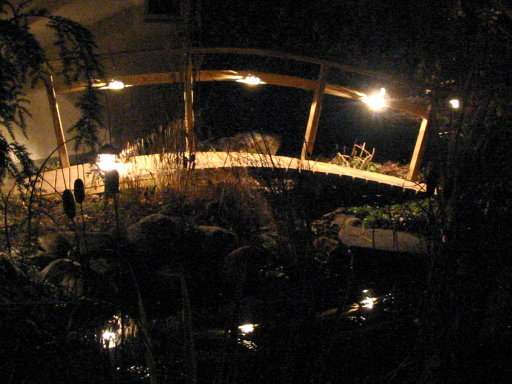
Which, I might add, looks really good at night, too!!
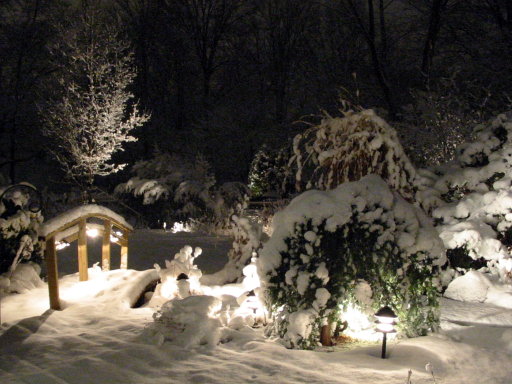
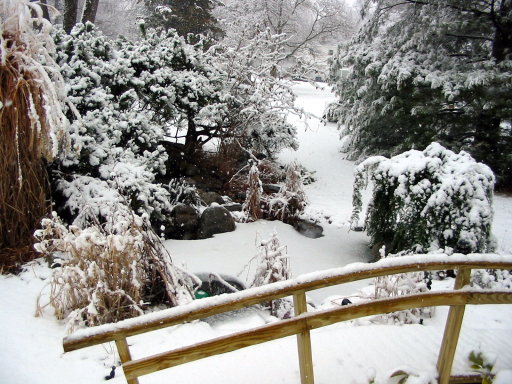
And then the Winter snow arrived...
This year was a particularly cold Winter, and wouldnt you know it,
the pond deicer had stopped working! So I was out there in 10
degree weather with buckets of warm water trying to keep the water
flowing until the new one arrived (which you can see there just
above the bridge railing).
Anyway, during this little ordeal, the hose that runs to the top of the water fall froze solid so I had to set up a temporary hose from the pump until it warmed up and thawed out. Hmm... maybe I should keep a spare pond-deicer on hand!
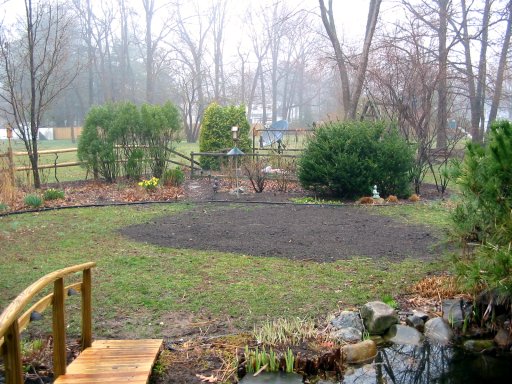
And then Spring arrived! You can see the results of our
Spring project here; there was a low spot there in the lawn and
the grass wasn't growing well. So the kids and I installed a pop-up
sprinkler in the center of this circle and dropped a ton of dirt
there and seeded it. Now generally, I dont bother with the lawn,
but it would be nice to have green grass growing right here.
Oh! And in this picture, I just noticed one other project my Father-in-law worked on last Fall; he replaced some of the rails on that split-rail fence in the background! Yeah, it was a busy year!!

