
Mulch Madness!
With so much going on this year, Spring 2012 deserves its own update!
In addition to the usual Springtime activities, like pruning shrubs and sealing the deck, we've also:
Would you like to know more? Then read on!
Mulch Madness!
One drizzly Friday morning in early March, a dump truck from Timothy's Center for Gardening deposited 10 cubic yards of mulch in our driveway. Years ago, it would take Catarina and I an entire weekend to spread this around the yard. However now that our kids are older, we had this pile finished off by 3PM Saturday afternoon!
But where did the mulch go??
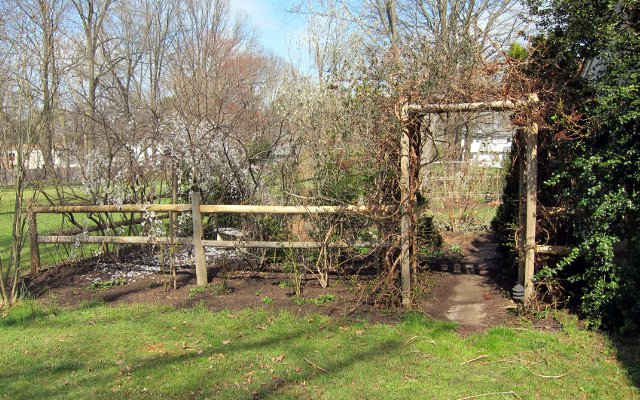
Welcome to the Garden
Entering from the front yard, the garden begins here. My dad and I built this split rail fence back in 1996. We've had to replace a few rails over the years, but all of the posts are still holding strong.
Can you tell which 3 rails I replaced this year?
The top rail to the left of the arch and the two short rails on the right side of the arch are the new ones.Our friends at Suburban Fence supplied the rails and posts, and also built the rustic archway for us. We've gone there for all our fence supplies ever since; it's a great family-owned business and they always have just what we need. In fact, a couple years ago when we had to replace the upper trellis on the archway, I sent them a photograph and the owner immediately recognized his fathers handiwork. As you can see, the replacement trellis he made fit perfectly! I just cant say enough about the nice people at Suburban Fence in Trenton, New Jersey!
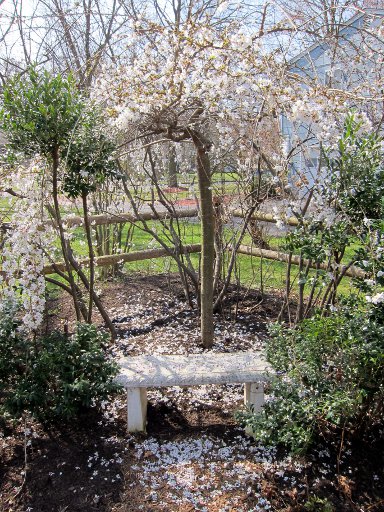
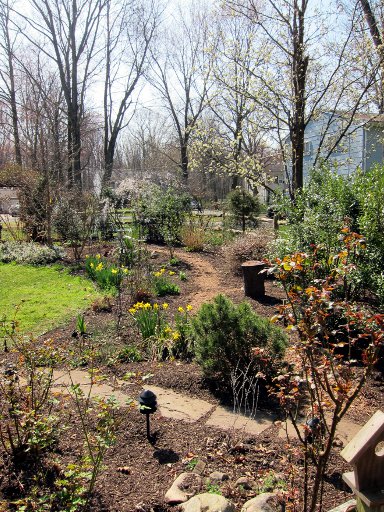
The Road Less Traveled
After entering through the archway, we'll veer off the flagstone walk and turn left. Strolling along a cedar mulch path, our first stop will be this bench beneath a weeping cherry tree. Later, after the blossoms have gone, the leaves will come out and provide a natural umbrella to shade the tired gardener from the hot Summer Sun.
In the second photo, you can see the cedar path as it winds away from the weeping cherry (in the background) and returns to the flagstone walkway near the vegetable garden. Along the way, feel free to take another respite at the stump seat we added a couple years ago!
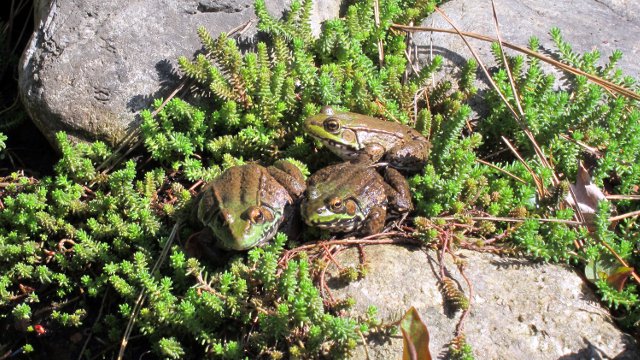
A Trio of Frogs
All 3 of these frogs overwintered in the pond this year. I was actually this close to them when I took the picture too. They are all very tame, at least, toward humans... with snakes and cats, not so much!
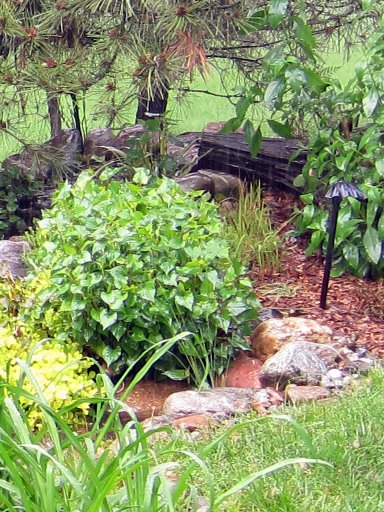
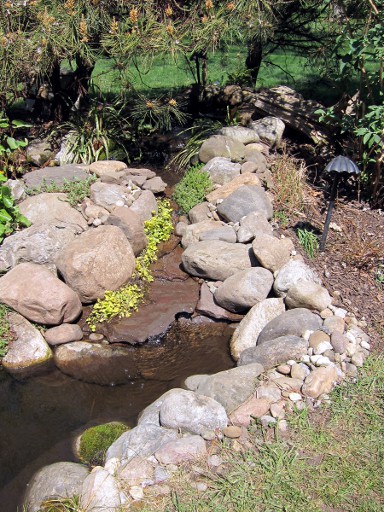
Waterfall Reconstruction (before and after)
The first picture was taken last year and shows how overgrown this waterfall channel becomes in late Spring. While that plant had nice flowers, it was extremely invasive and impossible to keep in check. So one Spring afternoon, I started pruning it back and, before I realized it, had removed all the rocks and roots down to the black pond liner! It was then I realized my "little pruning project" had turned into "major waterfall reconstruction."
The one thing I needed was a large flat stone to serve as the base of the falls. It had to be the right size and thick enough so people could step on it. I found this one for $8, and the striping on the rock face was an added bonus! The next step was to layer the existing flat stones up to the upper pool and refit the larger rocks around it. It's kinda like doing a puzzle, but you aren't sure if you have the right pieces. Another tricky part was to ensure all the big rocks were stable... when I walk up there, I do NOT want those stones moving under my feet!
I then took the yellow plant I had from the old design and laid it along the left side of the waterway to keep the water channeled down the center. At the base of the waterfall, I tried to make it look as if some flat stones had broken off and formed the lower shelf. The larger birds have already discovered that this is a good place to take a bath.
The last step was to sprinkle smaller stones into the crevices, imagining where they might end up if there were a flood of water coming down the channel. Catarina has since picked up some nice succulents at the nursery that fit between the rocks and complete this picture!

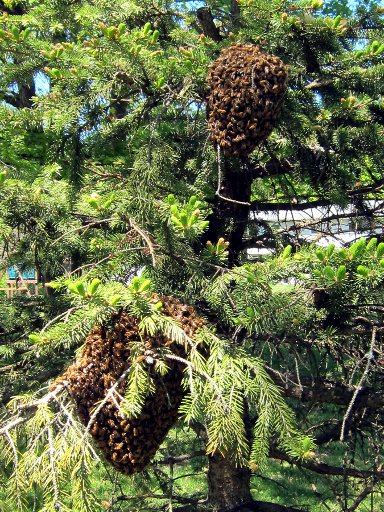
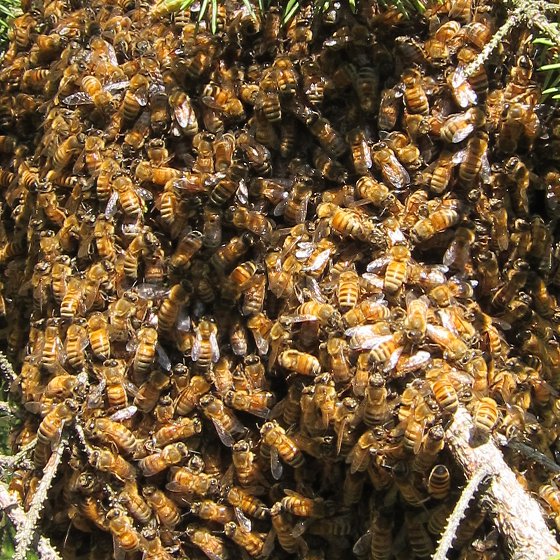
The Swarm!
Had you been in our back yard on Sunday, April 29th, around noon, this is what you would have seen! Thousands of honeybees, flying around an area covering 30 feet. Apparently, one or possibly two queen bees exited the hive taking 15000 worked bees with them (okay, I didnt actually count them). The bees themselves were not aggressive, even so, it still felt a little strange walking through a swarm of bees to take this picture.
Two New Colonies
After an hour or so, the bees settled down and formed 2 clusters in the pine tree next to the hive. It's hard to say whether there was a queen in each cluster or if the bees were just confused as to the location of the queen. The bees wait in a cluster while scout bees are sent out to find a good location for the new colony. When the location is decided, they all take off to their new home.
Knowing that I had a new honeybee colony here, I checked the New Jersey Beekeepers directory and called some fellow beekeepers to see if any were interested in taking my swarms. A nice fellow from Princeton came over and we clipped the branches that supported the swarms into 2 large plastic containers. He said if I ever needed more bees, to let him know!
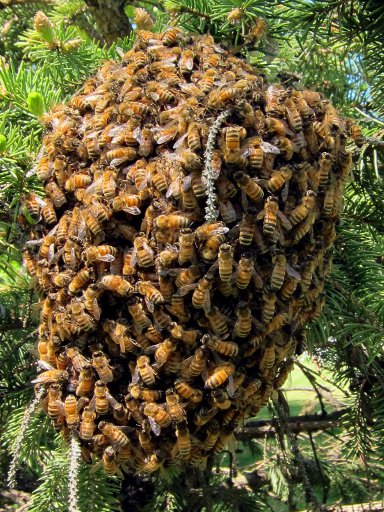
Gentle Honeybees
The bees are stuffed with honey and are very calm at this point. In fact, one of the beekeepers I called said I should try putting my hand into the cluster of bees to feel the heat they generate. I managed to push my finger into this cluster before chickening out! Maybe next time I'll try the whole hand. And maybe next time, I'll be ready with a hive box to start a second honeybee colony!

The New Queen
A couple weeks after the swarm, activity at the hive started to dwindle. Being concerned, I opened it up to check how the remaining bees were doing. And while I found a queen (and not the same queen I introduced two years ago!), there was no brood and very little stored honey. I had to make a decision as to whether or not something was wrong with the current queen.
I ultimately decided to requeen the hive, which means replacing the existing queen with a new one. The plan was:
Well, I did all of these things and, upon inspecting the hive, was happy to find the new queen (marked with a dot of yellow paint) roaming around the hive with her attendants at her side. A successful requeening!!
Whew. And with that, Spring 2012 has come to a close!

