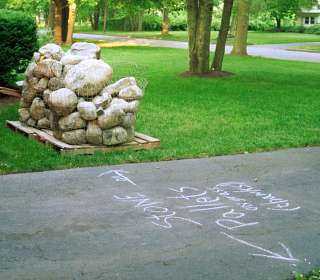
These are the two pallets of rocks we ordered.
No one was home when they were delivered so we wrote the delivery
instructions in chalk on the driveway.
Incidentally, in case you are thinking about doing this yourself,
the total cost came in just under $1000;
$50 for electrical supplies, $400 for rocks,
$480 for liners, pump and filter.
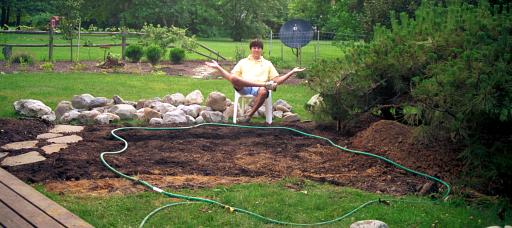
Surrounded by piles of rocks, here I am using a garden hose
to figure out the location and shape of the pond.
We wanted it close to the deck so we could see and hear it,
but not right up against the deck. There is a collection of
pine trees serving as the backdrop which were carefully tied
back (no cutting branches until there is a plan).
The electrical trench can still be seen. It's about 2.5' deep.
The wire lives inside plastic conduit and there are GFCI outlets
both inside the house and in the weather-protected outdoor socket.
I did this work before beginning the pond (it took a couple of
weekends). This required an electrical permit from our town
and the inspector was very helpful in making sure I got everything
right. Wanted to be on the safe side here, since electricity and
water can be dangerous!

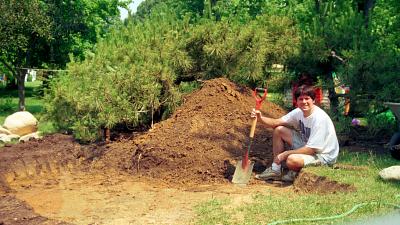
Digging is underway. We planned a waterfall somewhere in those
pine trees, so that's where I started piling the dirt. The dirt
from the pond becomes the base for the waterfall.
Whew, first level is dug out. This is about 9" deep now.
You can see that pile of dirt is getting bigger. Here, I was
under the misguided impression that the water was going to fall
from that height... not sure what I was thinking!
Oh yeah, I remember what I was thinking... dig dig dig.
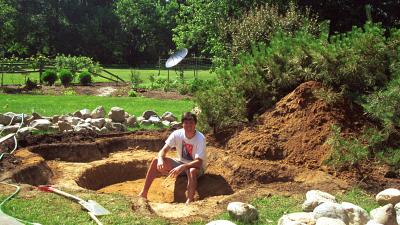
Here, the center is about 18" deep. It later went down to 23".
We could not go deeper than that, since my town classifies
any body of water 2' deep as a "pool" (which requires fencing).
previous
next

